
CA - 通話履歴
エージェントが自身の通話履歴を確認できます。

ステップ1:スクリプトの設定
Brekeke CAの[スクリプト]画面を開き、「call_history」という名前のスクリプトを登録します。
種別は「ページ」としてください。
var pre_html = '<html>';
pre_html += '<head>';
pre_html += '<title>通話履歴</title>';
pre_html += '</head>';
pre_html += '<body><table border="1">';
pre_html += '<tr>';
pre_html += '<th nowrap>通話ID</th>';
pre_html += '<th nowrap>カスタマー</th>';
pre_html += '<th nowrap>通話開始日時</th>';
pre_html += '<th nowrap>通話終了日時</th>';
pre_html += '<th nowrap>通話時間</th>';
pre_html += '<th nowrap>通話録音</th>';
pre_html += '</tr>';

var suf_html = '</table></body></html>';

var select = function(request, ca, user) {
	var tenant = request.getParameter('tenant');
	var user_id = user.getUser_id();
	var limit = 3;

	var sql = 'select a.rid,a.customer,a.start_date,a.end_date,a.call_time from `'+ tenant + '_m_call` a';
	sql += ' where a.rid in (';
	sql += ' select b.rid from `' + tenant + '_r_session` b USE INDEX (r_session_index3) where b.ua_number="' + user_id + '" and (b.ua_type=32770 or b.ua_type =2 or b.ua_type =32769 or b.ua_type =1)';
	sql += ' )';
	sql += ' and a.type !=0 and a.invalidated = 0';
	sql += ' order by a.start_date desc limit ' + limit;

	var con, stm;
	var buf = '';
	try {
		con = ca.getConnection();
		stm = con.createStatement();
		var rs = stm.executeQuery(sql);
		while(rs.next()) {
			var rid = rs.getObject('rid');
			buf += '<tr>';
			buf += '<td nowrap>' + rid + '</td>';
			buf += '<td nowrap>' + rs.getObject('customer') + '</td>';
			buf += '<td nowrap>' + ca.toYmdhms(rs.getObject('start_date')) + '</td>';
			buf += '<td nowrap>' + ca.toYmdhms(rs.getObject('end_date')) + '</td>';
			buf += '<td nowrap>' + ca.toHms(rs.getObject('call_time')) + '</td>';
			var url = ca.getRfsUrl(tenant, rid, user_id, request);
			if(url) {
				if(url.indexOf('audio') > 0) {
					buf += '<td nowrap><audio src="' + url + '" controls="controls" preload="none" ></audio></td>';
				} else {
					buf += '<td nowrap><a href="' + url + '">download</a></td>';
				}
			} else {
				buf += '<td nowrap></td>';
			}
		}
		rs.close();
	} finally {
		if(stm) {
			stm.close();
		}
		if(con) {
			con.close();
		}
	}

	return pre_html + buf + suf_html;
}
※ 表示する履歴数を変更したい場合は、以下の変数の値を変更して下さい。
var limit = 3;
ステップ2:CIMの設定
Brekeke CIMの[管理メニュー] > [設定] > [アドバンスド オプション]画面を開き、以下のパラメーターを設定します。
widget.menu.app.url.1=<CA URL>/page?tenant=#agentInfo.tenantName#&loginkey=#loginkey#&script=call_history&function=select
widget.menu.app.title.1=通話履歴

CAのURLが「https://www.brekeke.jp/ca」の場合の例
widget.menu.app.url.1=https://wwww.brekeke.jp/ca/page?tenant=#agentInfo.tenantName#&loginkey=#loginkey#&script=call_history&function=select
ステップ3:使い方
- エージェントはBrekeke CIMにログインし、CIMツールバーの[メインメニュー] > [アプリケーション] > [通話履歴]を選択します。
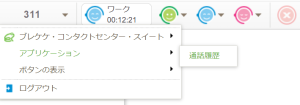
- 自身の通話履歴が別ウィンドウで表示されます。

※ 上記のように通話録音を画面上で再生したい場合は、Brekeke CAの[管理メニュー] > [設定] > [アドバンスド オプション]に以下のパラメーターを設定してください。
adminui.use.audio.tag=true